How Professional Cabinet Painters Get a Flawless Finish
When you decide to have your cabinets professionally painted, the question that follows is usually the same: what exactly does a professional do that makes the result worth paying for? It’s a fair question, and the answer isn’t the paint brand or the painter’s eye for color. The answer is the process. How professional cabinet painters get a flawless finish comes down to a disciplined, multi-stage sequence where every step sets up the next — and where skipping or rushing any one of them shows in the final result.
This blog walks through each stage of a professional cabinet painting project in the order a professional executes it, explaining what happens at each step and why it matters to what the finished surface looks and feels like.
What a Flawless Cabinet Finish Actually Looks Like
Before walking through the process, it helps to understand what the end result should actually deliver. A flawless cabinet finish is smooth to the touch with no brush marks, roller texture, drips, or variation in sheen. Color is consistent across every door, drawer front, and frame — no patches that are lighter or darker, no areas where the paint built up differently than others.
Durability is the other half of the standard. A quality finish has fully cured to a hard, cleanable surface that holds up to the grease, moisture, and daily contact that kitchen and bathroom cabinets deal with constantly. It doesn’t chip at the edges when a door closes. It doesn’t peel at the hinge points six months in.
A rushed job can look similar on day one. The difference shows up in raking light, where brush marks become visible. It shows up at the hardware holes, where edges chip early. It shows up at the corners and hinge locations, where the finish starts separating before a properly executed job would show any wear at all. Understanding what a quality result looks and feels like is what lets a homeowner recognize whether the process that produced it was done right.
Step 1 — Assessment and Project Planning
A professional begins with an assessment before any work is quoted or scheduled. This is not a walkthrough — it determines the entire project approach.
The assessment covers:
- Cabinet material: solid wood, MDF, plywood, or laminate each require different prep and primer approaches
- Condition of the existing finish: painted, stained, varnished, or raw substrate each present different starting conditions
- Grease buildup and surface contamination
- Any damage — dings, delamination, failing edges — that needs to be addressed before painting begins
- Door and drawer front configuration and hardware type
MDF and laminate require different primers than solid wood. A previously varnished surface requires different prep than a painted one. A professional who skips the assessment and proceeds on assumptions is guessing, and guessing produces inconsistent results. The assessment determines the prep sequence, primer selection, number of coats, and a realistic project timeline — all before a single step of physical work begins.
Step 2 — Disassembly and Labeling
All cabinet doors and drawer fronts are removed before any prep or painting begins. This is not optional for a professional result.
Painting doors in place produces predictable problems:
- Drips form at the edges where the brush loads up against the frame
- Inside faces get missed or receive uneven coverage
- Paint bridges the gap between the door and the frame, causing the door to stick when it closes and tearing the finish when it’s opened
Every door and drawer front is labeled before removal so it returns to the exact position it came from. Cabinets that have settled over years develop slight variations in fit. A door reinstalled in the wrong opening won’t hang or close correctly, and correcting the fit after the finish is applied means damage to the new paint. The labeling system is what prevents that from happening.
Step 3 — Cleaning and Degreasing
Kitchen cabinets accumulate grease, cooking oil, and residue over years of use. This contamination is often invisible — it doesn’t look dirty — but it is the most common cause of paint adhesion failure on cabinets.
Professional degreasing is not a quick wipe-down. It involves a dedicated degreasing solution applied thoroughly to all surfaces, including inside edges and frame members that are easy to miss. The surfaces that see the most contamination are often the ones that get the least attention during a rushed cleaning pass.
When this step is skipped or rushed, paint applied over grease contamination cannot bond to the surface. It may appear fine for weeks. Then it begins separating. When a cabinet finish fails this way, there is no patch or touch-up that corrects it. The only path forward is stripping the cabinets back to bare substrate and starting the entire process over — which means paying a second time for a result that should have been right the first time.
Bathroom cabinets present a different version of the same problem. Grease is less of a factor, but humidity and product residue — hairspray, lotion, cleaning sprays — create their own adhesion challenges. The same thorough cleaning approach applies.
Step 4 — Sanding
Sanding creates the mechanical profile that paint and primer need to bond to. A surface that looks smooth to the eye is often too slick for paint to grip without it.
Professional sanding covers two distinct stages:
- An initial scuff sand that breaks the gloss of the existing finish and opens the surface for adhesion
- Sanding between coats to knock down any raised grain or texture before the next coat is applied
The grit matters at each stage. Coarser grits are used for the initial prep pass. Finer grits — 180 to 220 — are used between coats. Sanding too aggressively between coats cuts into the previous layer. It too lightly leaves texture that telegraphs through the finish in raking light.
Sanding also addresses the minor surface imperfections — dings, scratches, raised grain — that would otherwise show through the final finish regardless of how carefully the paint is applied.
Step 5 — Priming
A dedicated cabinet-grade primer is what makes everything that follows work correctly. It is not a shortcut step and it is not interchangeable with the topcoat.
Primer does several things that paint alone cannot:
- Seals porous surfaces so the topcoat doesn’t absorb unevenly, which causes color variation and requires more coats to correct
- Blocks tannins and stains from bleeding through, particularly on wood species like oak and cherry that are prone to bleed even under paint
- Creates a uniform base so the topcoat color applies evenly and consistently
Oak cabinets require an additional consideration. Oak has a pronounced open grain that telegraphs through paint if not addressed before priming. Professionals use a grain-filling primer or apply a grain filler at this stage to ensure the surface is smooth before the topcoat goes on. Without it, the grain pattern shows through the finished surface regardless of how many coats are applied on top.
Primer selection also connects directly back to the assessment in Step 1. MDF requires a different formula than raw wood or a previously painted surface. Using the wrong primer produces adhesion failures that don’t appear until weeks after the job is complete — long after the crew has left and the homeowner has moved on. If you’re weighing whether cabinet painting makes sense for your kitchen or bathroom, the primer stage is one of the clearest demonstrations of why professional execution matters.
Step 6 — Paint Application
Cabinet-grade paint is applied differently than wall paint. The goal is a factory-smooth finish with no visible brush marks, texture, or lap lines, which requires the right equipment, technique, and conditions working together.
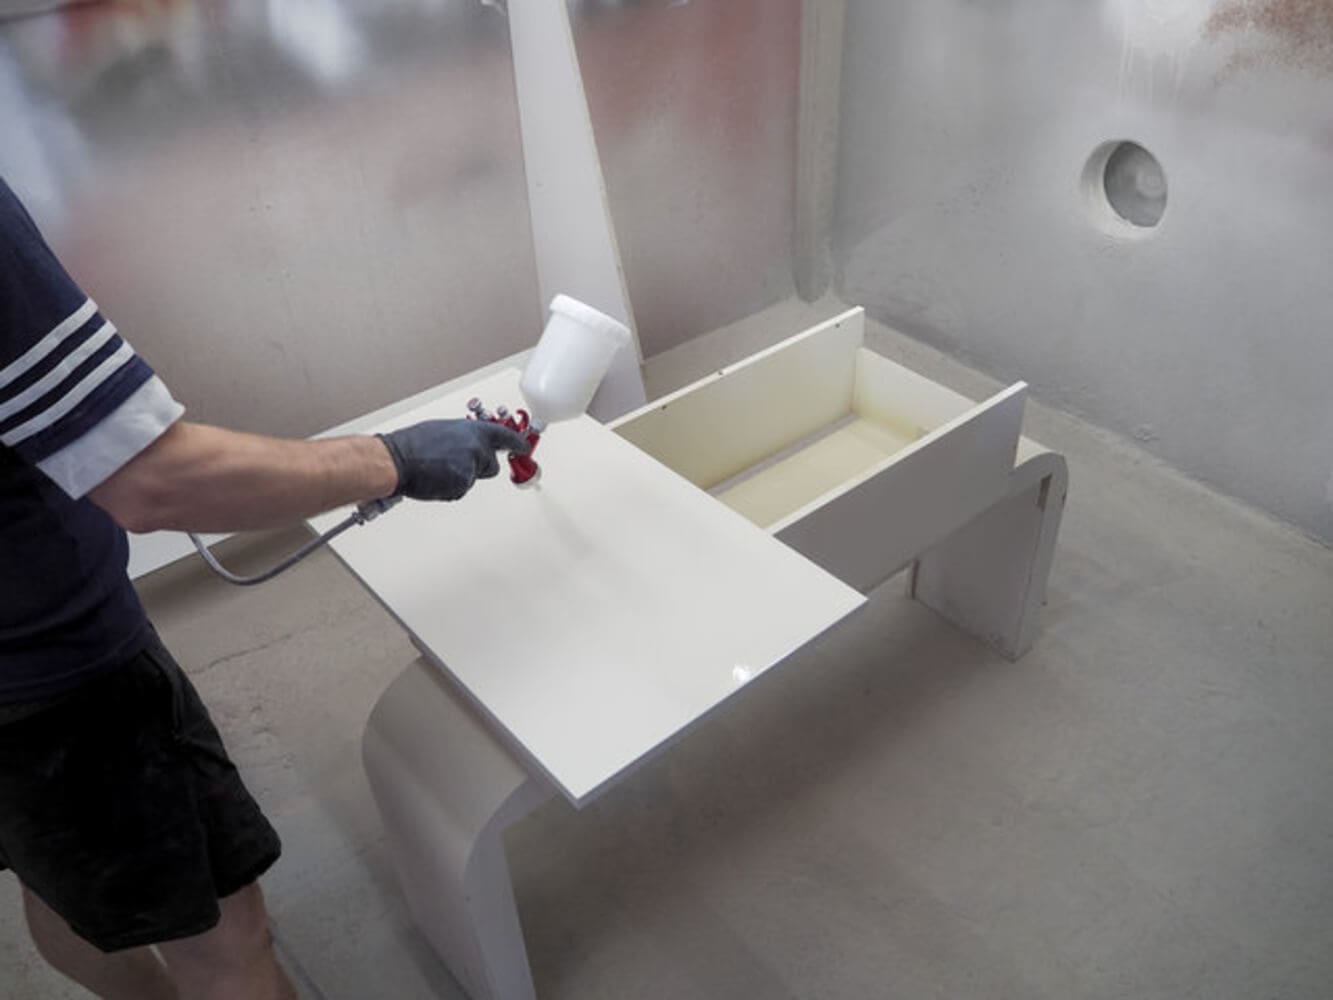
Professionals use an airless or HVLP sprayer to apply paint in thin, even coats that self-level into a smooth film. This is what produces the result that brushes and rollers cannot replicate on a flat cabinet door. Before spraying begins, all surfaces that are not being painted are masked and the application environment is made as dust-free as possible — airborne particles that land in wet paint become permanently embedded in the finish.
Thin coats are applied and allowed to dry between applications. A single heavy coat sags, runs, and takes far longer to cure. Multiple thin coats build a more durable, more uniform film.
Baton Rouge’s humidity is a real variable at this stage. High humidity slows evaporation between coats and extends the drying window. Applying a second coat over a first coat that hasn’t fully dried causes the finish to wrinkle, lift, or cure soft. Professionals monitor conditions and adjust their schedule accordingly rather than recoating on a fixed timeline.
The cure window after the final coat matters just as much. Cabinet-grade paints can take 21 to 30 days to reach full hardness, and in Baton Rouge’s climate that window needs to be respected before the cabinets are returned to full use. A finish that looks done is not the same as a finish that has cured. Understanding how humidity affects paint durability at the cabinet level explains why this timeline isn’t arbitrary.
Cabinet doors are painted flat throughout this stage to prevent runs, and each coat is inspected before the next is applied.
Step 7 — Reassembly and Final Inspection
Reassembly follows the labeling system established at disassembly. Every door and drawer front returns to its original position. This is what ensures proper fit and alignment without adjustments that could damage the new finish.
Hardware reinstallation is handled carefully. Hinges, pulls, and knobs reattached carelessly at this stage chip edges and scratch the surface that the entire process was built to protect. The final coat is only as intact as the care taken in the last step.
The final inspection happens before the homeowner sees the finished result. The professional reviews every surface in raking light to catch drips, dust nibs, uneven sheen, or missed areas. Anything that doesn’t meet the standard is addressed. When the homeowner walks through, doors open and close correctly, hardware is aligned, and the finish is consistent across every surface. That walkthrough is the handoff — and it only works because every step before it was done correctly.
A properly executed cabinet finish also holds up over time in ways that are worth understanding. Caring for painted wood surfaces after a professional job is straightforward when the finish was applied and cured correctly — the surface cleans easily and resists the kind of early wear that signals a rushed job underneath.
Every Step Earns the Finish — That’s What You’re Paying For
A flawless cabinet finish is not the result of better paint or a faster crew. It is the result of a process where every stage is executed correctly and each step creates the conditions the next one needs to work. Assessment informs prep. Prep makes primer work. Primer makes the topcoat bond. Application technique and cure time determine what the finish becomes after it dries.
The homeowner who understands this process knows what to look for when evaluating a professional. They know why the timeline is what it is. They know why a quote that compresses the schedule or skips steps is not a better deal — it’s a different product, and the difference will show.
If you’re ready to move forward, the next step is a consultation. A professional can assess your specific cabinets, walk you through what the project will involve, and give you an honest picture of the timeline and what the finished result will look like.
Prestigious Painting offers professional cabinet painting services in Baton Rouge for kitchen and bathroom cabinets. Contact us today to schedule your consultation and find out what your project will involve.